Blog

Headless Raspberry Pi Setup

Most of my Raspberry Pi’s dotted around the house are set to run headless on WiFi and only accessed over SSH or from a self-hosted webpage. This make running them really easy but setting them up can be tricky. This post is going to cover the basics of getting your headless Raspberry Pi onto a password protected WiFi network without first connecting to it over Ethernet.

First head over to the Raspberry Pi downloads page and get the latest image. For this post I am using Raspbian Buster Lite.

Once the desired image has been downloaded, flash the image to your SD card. For this I use Etcher however you can also use Win32DiskImager.

Once the SD card is complete, navigate to the boot partition on the SD card. You may have to remove and replace the SD card into the PC as Etcher normally ejects it when complete.

To configure WiFi and define a network to connect to, create the file wpa_supplicant.conf in the boot partition.

ctrl_interface=DIR=/var/run/wpa_supplicant GROUP=netdev
update_config=1
country=GB
network={
         ssid="some-ssid"
         psk="some-password"
         key_mgmt=WPA-PSK
         id_str="home"
}

Next you need to enable SSH. By default ssh is turned off. All that needs to be done to get SSH enabled is to create a file called SSH in the boot partition.

touch ssh

This completes the setup off the Raspberry Pi. Insert the SD card into the Raspberry Pi and allow it to boot. If the WiFi setup above is correct, it will connect to the WiFi and get assigned an IP address.

I then use a tool called Fing which will search for all devices on my network. This will give me the assigned IP address of my newly configured Raspberry Pi.

Once you know the IP address you want to connect to, login using SSH and the default password. To set a static IP address, edit dhcpcd.conf.

sudo nano /etc/dhcpcd.conf

And add the following to the bottom of the file. Change the addresses to those that fit your network.

interface wlan0
static ip_address=192.168.0.167/24
static routers=192.168.0.1
static domain_name_servers=192.168.0.1 8.8.8.8

Once you set the static IP address, reboot and connect using the new address.

sudo reboot

Now you can continue with the usual setup:

  • Change the default password
  • Increase the partition size
  • Install applications
    • apt-get: vim, git, python3-pip
    • pip3: flask

Modifying an applications priority

By default, Windows runs applications with their priority set to Normal.

Changing this priority cannot be done from the LabVIEW build. Therefore, if an application needs to run with a specific priority, the priority needs to be manually changed each time the application is run.

This can be tedious as well as very easily forgotten about. Additionally, if a Realtime priority is required, an administrator account is needed.

There is a way to change the priority of an application using the Windows Management Instrumentation Command line (WMIC) utility.

wmic process where name='<application.exe>' CALL setpriority '<priority>'

Priority LevelPriority Value
Realtime256
High128
Above Normal32768
Normal32
Below Normal16384
Low64

I have written a utility that can be run when starting an application which will set the priority automatically. As mentioned earlier, when setting a Realtime priority, the command needs to be run as an administrator.

Demo video changing the priority of an application.

I have only tested this on Windows 10 but should work on earlier versions. A demo application can be found here.

Update

I have been asked by a few people in the LabVIEW community if changing the priority for an application really makes a difference. Although I hadn’t done any benchmarking, from viewing the results from our particular application, I could say that it did make a difference; however I couldn’t prove it.

I therefore made a benchmarking application that simulates the way we are capturing data and why it is important to us to set the application priority. I can’t go into the details of the application, but here is a brief, simplified overview.

Application Overview

The application is running on a Windows 10 laptop and the system under test runs at a fixed speed (meters/min). Measurements are then taken at a fixed rate (dt). The measurement is recorded with an associated ms time. We need to capture a measurement at least every 5ms and
the distance is updated at a rate of around 1sec. The test will run for anything from 30 min to 3+ hours. In the post processing, we match time to distance and interpolate the missed distance measurements.

We had very short deadlines and all the equipment had been specified and purchased before I started the project. This introduced limitations which we had to work around; at least for this initial get-it-out-there release.

Benchmarking

To perform a benchmark I ran a similar timed loop 90000 times at a rate of 5ms. This 90000 loop execution was then repeated 5 times. This is almost the same process the test takes. The 90000 loop is repeated for the entire test. 90000 is an instrument limitation in that it can only store 90000 data points. In our test application, the measurement gets taken inside the timed loop.

These 5 loops of 90000 samples was then repeated for each priority. I only tested the three extreme cases. Normal which is the default run type, Realtime and Low.

Benchmark code subset

The three graphs below show 5 loops of 90000 samples running at a dt of 5ms. The numbers plotted are the delta time between each loop iteration. The time is taken from the Tick Count (ms) function as can be seen above.

Low Priority
Normal Priority
Realtime Priority

From the images above, it can clearly be seen that running with Realtime priority gives a better periodic result, even when running with a timed loop. As virtually nothing is being done within the timed loop, I assume all the variance in dt is down to something Windows is doing. When we analysed the real test results, the variance was a lot larger.

All the code is in a Bitbucket repository so feel free to clone it and have a look. The repository contains a submodule so don’t forget to update the submodule.

git clone --recurse-submodules https://bitbucket.org/Labvolution/priority-benchmarking.git

I hope this explanation is helpful. Get in touch if you have any comments.

LabVIEW Environment Setup

Setting up your LabVIEW environment is rather personal as it guides your development flow. Enabling and disabling certain settings can make your development process more efficient and less frustrating.

While contracting for a company that has extremely tight IT permissions, combined with the way user accounts are managed, I came across another LabVIEW setup modification that significantly improved my efficiency, especially when building applications and installers.

LabVIEW uses two directories which by default are installed to %USERPROFILE%/Documents/LabVIEW Data/ and %LOCALAPPDATA%/Temp. The Compiled Object cache as well as other intermediate files are saved within these directories.

When developing on a standalone PC, making changes to these directories makes little difference as everything is kept local. However, when working on a supplied PC where the user directory is mapped to a network location, things can down significantly. The largest effect can be seen when working over a VPN with a networked mapped user directory.

So how can this be fixed?

Open the LabVIEW Tools -> Options menu.

LabVIEW Tools -> Options

Navigate to the Paths section

LabVIEW Options -> Paths

Select Default Data Directory from the drop down, deselect Use default. Then Browse to a local folder to be used instead.

LabVIEW Default Data Directory

Select Temporary Directory from the drop down, deselect Use default. Then Browse to a local folder to be used instead.

LabVIEW Temporary Directory

Close the Options and restart LabVIEW. When restarting LabVIEW and opening projects for the first time after the change, you will notice a slow-down as the cache is rebuilt. This will only affect the first load of a project.

If you have moved the folders from a network to local directory, you should notice performance improvements when opening LabVIEW, opening projects and building distributions.

LabVIEW System Exec with callbacks

In my day-to-day LabVIEW development, I perform a lot of System Exec calls. Whether it’s getting the status of my git repositories or communicating with instruments. Some commands execute quickly so a small delay is unnoticeable, however some longer running tasks appear to not be doing anything.

My issue with the standard LabVIEW System Exec vi is that you only have two ways to use it.

The first is when “wait until completion?” is True, the command runs in a terminal with no progress visible. When the command completes, what should have been written to the terminal during the command’s execution is written to the Standard Output indicator. This method is fine for very quick commands.

The second method is setting “wait until completion?” to False. This will then open a terminal, display the progress within the terminal window and when complete write nothing to the Standard Output indicator. This method is good to show progress, but when the command completes, you cannot get that output into your LabVIEW application to parse.

What I want is a middle ground where you can get the progress during the command execution AND the final output into your application.

I have been working on a tool lately to manage the many submodules within any of my projects. It uses the LabVIEW project provider framework and runs when projects are opened. I have started to take advantage of git submodules for all my reuse code, drivers and anything that is shared between projects. The tool uses System Exec to execute various git commands. Many of the commands take a while to execute because of the number of submodules within a given project.

Having the user interface appear to hang while the command is executed is not very comfortable for the user. Even though I know the software is working and what is happening in the background, I still feel uncomfortable waiting for a command to execute.

To get around this, I have used two .net classes to execute the command. Callback vi’s are used to register event callbacks which in turn generate LabVIEW events to display progress to the user.


There are two modes of operation for the Callback System Exec vi. The calling vi has the option to create user event references, which it subscribes to, and passes the references into the Callback System Exec vi. When the Callback System Exec vi gets a standard output update, it uses the passed in user event reference to notify the calling vi of the updated standard output text.

If no user event references are passed in from the calling vi, the command will still be executed and once complete, the standard output can be read as a normal indicator. As well as the optionally passed in user event references, the Callback System Exec vi creates its own internal user events which register to the standard output and builds a string to return when complete.

Having the ability to see the response as it happens from a command has a huge advantage when executing long-running commands that a user must wait for.


This Callback System Exec vi has made my submodule tool a lot more user friendly by showing continuously the output from the command. Some commands take 10-15 seconds to execute so seeing nothing in this time can leave the user not knowing what is happening.


If you want to have a look at the code and give it a try, you can clone the repository from bitbucket. Feel free to suggest changes and modifications, fork the repo and collaborate to make it better.


Why you should be using Git submodules

When working on software projects, specifically in LabVIEW, I have never liked the way reuse libraries and custom instrument driver libraries are source controlled or included in projects. I’ve tried multiple solutions, and each have their own ‘dirty’ feel about them.

Disclaimer:

I’m still trying to figure this out and learning more about submodules every day

The command line must be embraced as git submodules are not supported in many GUI tools.

Using vi.lib or instr.lib

Placing common libraries in either vi.lib or instr.lib is a good method of sharing the same version of library between projects. Typically, a vi package is created and then installed into the LabVIEW directory. The packages, as well as the library source code can be source controlled.

The disadvantage of this method, in my opinion, is when you want different versions of a specific library used across different projects. (I’m not a VIPM user so this might be possible)

Copy and paste the library into your project

Another method for including common libraries into a project is to copy and paste the source code into the project. This makes moving a project easy as all the dependencies are contained within the project, however it does break clean source code control and creates duplicate code.

The problem comes in when you want to make a change to the common library within a project but also want that change applied to other projects. The updated common library then needs to be copied to the other projects manually.

But what if only some projects need updating or you want to quickly and efficiently share the common changes between developers?

Say hello to Git submodules

Git submodules are reference pointers to other Git repositories. This means once a project is cloned from a repository, additional repositories can be added (cloned) into the existing project folder. Git submodule also supports recursion; however this is disabled by default.

As an example, I have two library repositories already created and stored on Bitbucket. The following will be a step-by-step of how to create a project and add the libraries as submodules.

Create a local bare repository

mkdir git-submodule.git
cd git-submodule.git/
git init --bare

Clone the main project repository

git clone "C:\git-demo\git-submodule.git" "git-submodule"

Once cloned, create and save a LabVIEW project, then commit it to the repository.

git add .
git commit -m "Add empty LabVIEW project for submodule example"
git push origin master

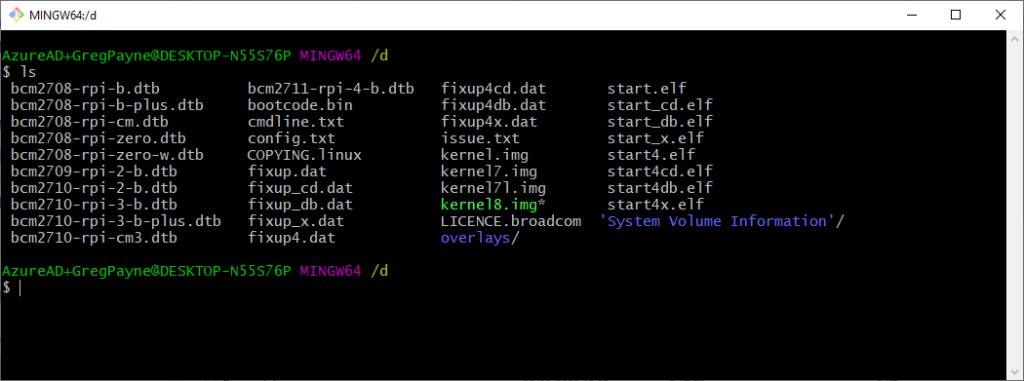
The files on disk should look as follows:

git submodule labview

Now we want to add your common libraries, which are in their own repositories, to our project. The two common libraries I will add is a simple dialog library and math library.

git submodule add git@bitbucket.org:Labvolution/driver_math.git
git submodule add git@bitbucket.org:Labvolution/driver_dialogs.git

Once the submodules have been added, a new file, .gitmodules, is created with the reference to the submodules.

git submodule labview

[submodule "reuse-libs/driver_dialogs"]
    path = reuse-libs/driver_dialogs
    url = git@bitbucket.org:Labvolution/driver_dialogs.git
[submodule "reuse-libs/driver_math"]
   path = reuse-libs/driver_math
   url = git@bitbucket.org:Labvolution/driver_math.git

The reuse-libs folder now contains the submodule libraries.

git submodule labview

A git status on the main project repository will show the changes. These are automatically staged when the submodules are added.

git submodule labview

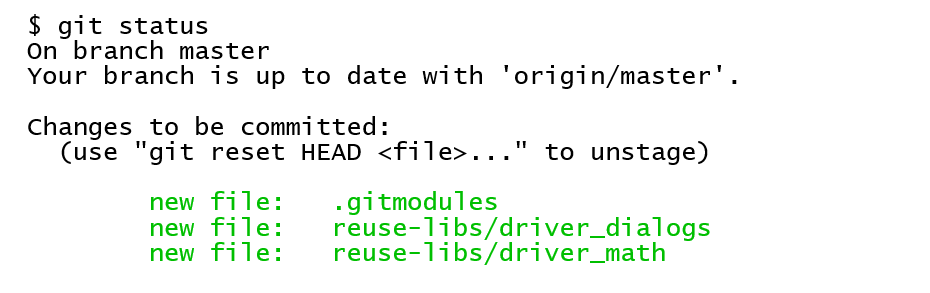
The changes need to be committed.

git commit -m "Add common libraries as submodules"

The common libraries, each in their own repositories, are now part of the main LabVIEW project which is itself in a repository.

git submodule labview

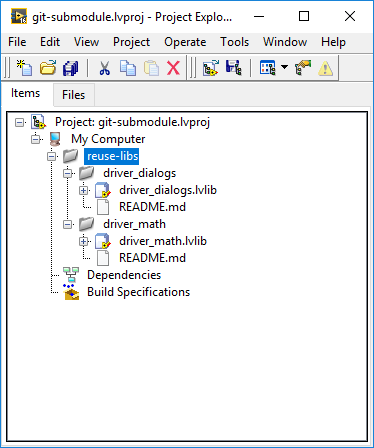
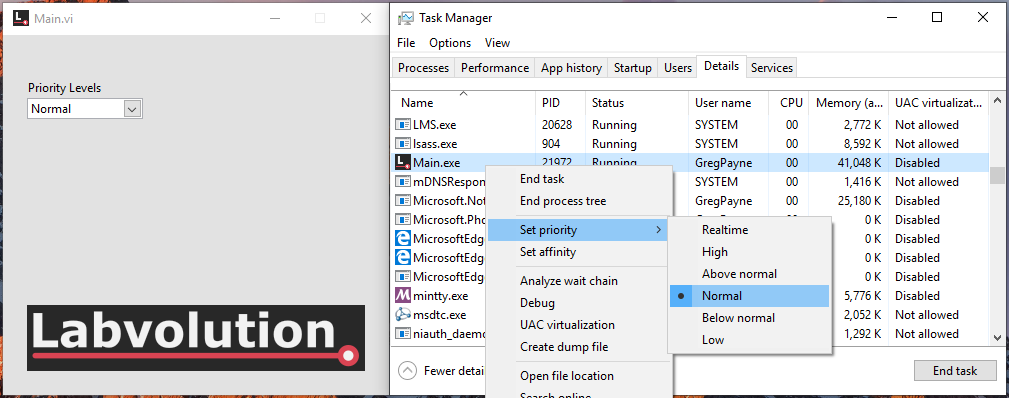
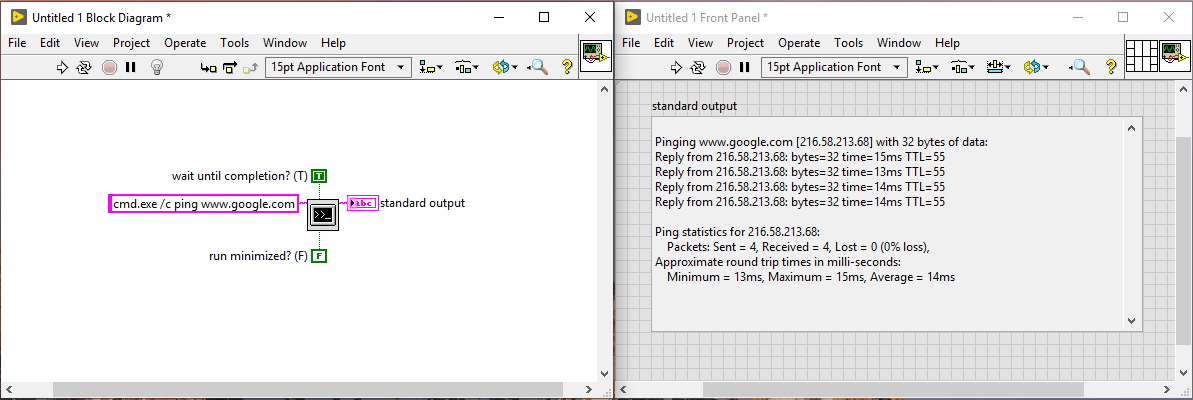
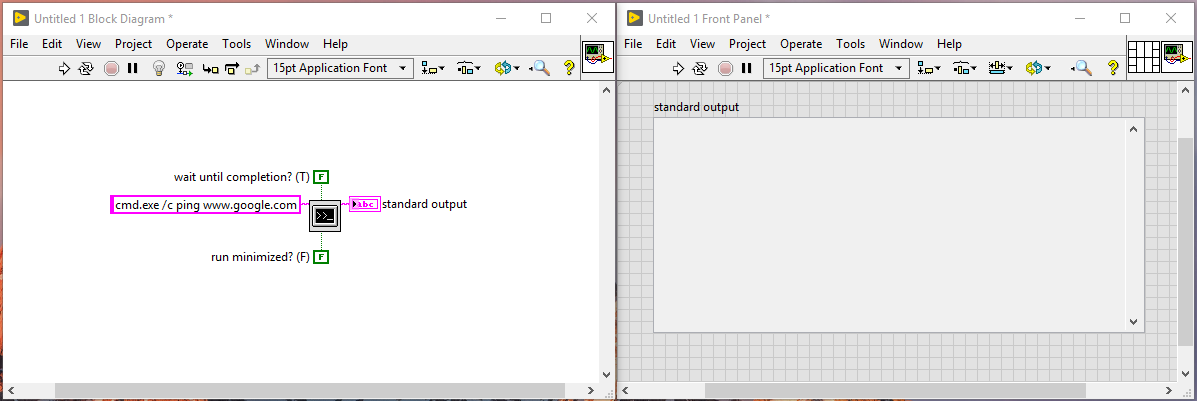
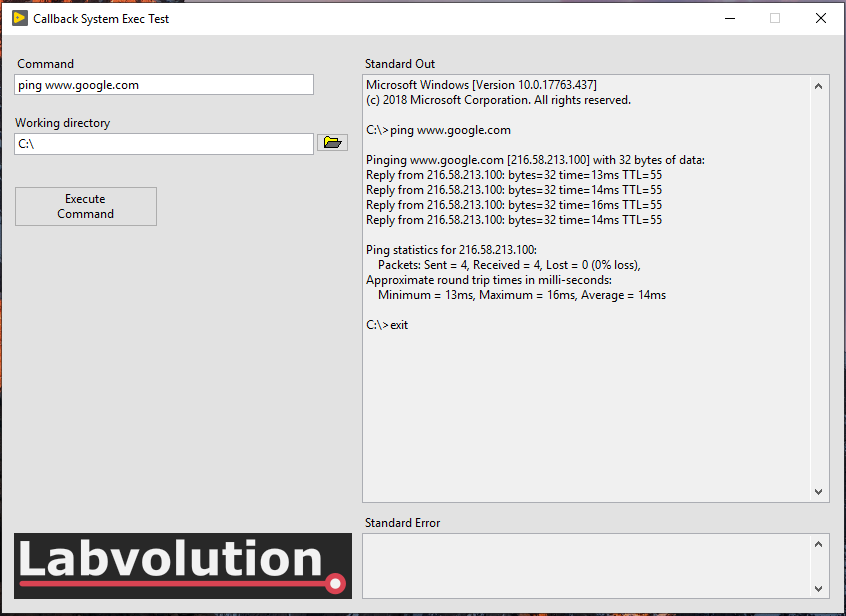
A main vi can then be created to test the libraries.

git submodule labview

These changes can be added and committed to the main project.

If a library is modified (by adding a new vi), committing the changes will be a two-stage process, the first being commit the changes to the library, and then committing the new submodule reference to the main repository. This tells the main repository which version (commit hash) to use.

git submodule labview

To use a previous version of the library, checkout a specific hash or branch of the submodule. Then git add it to the main repository.

git submodule labview

Notice that the “two button dialog.vi” is no longer available.

git submodule labview

A git status on the main repository will show a change in the submodule.

git submodule labview

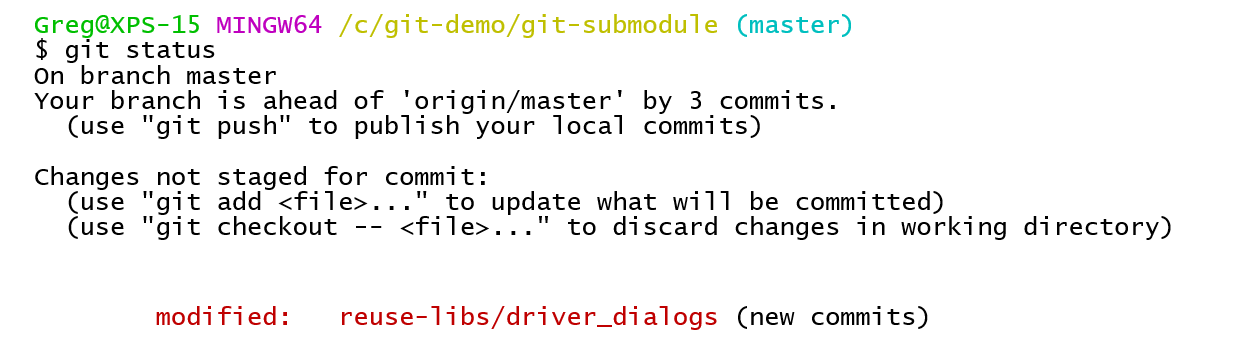
Having to add a specific submodule reference to a main repository, allows you to use different ‘versions’ of the submodule in different projects.

LabVIEW Project

When there are git submodules within a project, it is always a clever idea to know what they are, even though they are tracked from the main repository.

By using a post build vi, a log file can be added to the output build directory which shows what submodules are included, as well as what hash reference is used.

git submodule labview

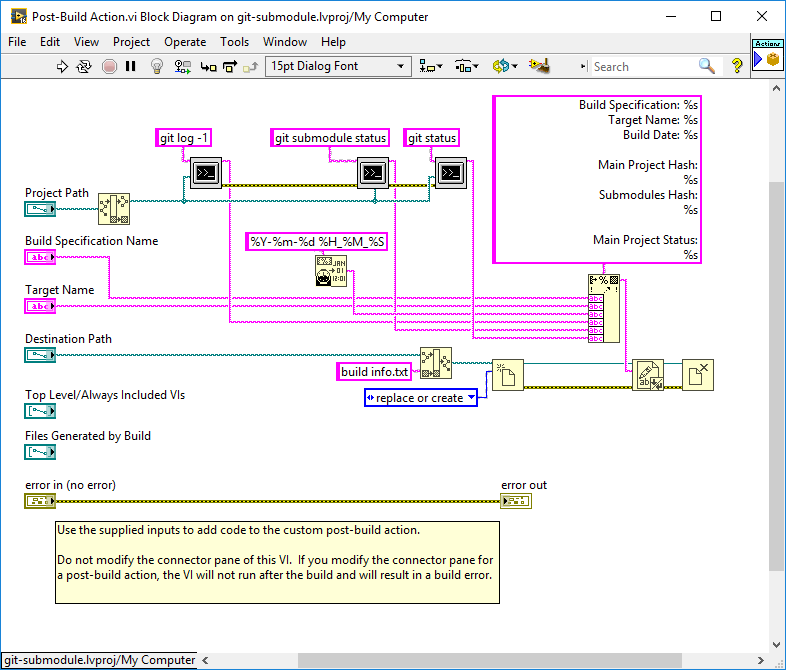
The main part is the submodule information, as this can vary from project to project. To get the submodule status, execute

git submodule status

which will return

36054d63f5d22284e2b5d7e40798af0fbbda14e0 reuse-libs/driver_dialogs (heads/development/2016)
b2089a11fb281ebf5eebb29f9f9080d81ec66933 reuse-libs/driver_math (heads/development/2016)

Conclusion

I have started using Git submodules in new projects as well as refactoring old projects when needed. I see a huge benefit in using them as they encourage

  • multiple smaller repositories for common libraries
  • low coupling as common libraries should be stand-alone
  • multiple projects can share a common library, but not be forced to use the same version
  • a submodule can have its own submodule

There is a learning curve that needs to be climbed when starting out using Git submodules, however seeing what they provide in the long run, it’s well worth it.


References:

https://torbjoernk.github.io/article/2013/04/03/struggling-with-git-submodules-and-mercurial-subrepositories/

https://git-scm.com/docs/git-submodule