Blog

Adding C# Class Libraries into LabVIEW Applications

Knowing how to include C# libraries into a LabVIEW project can be a very useful tool. There are many reasons why you would want to include C# dll’s into a LabVIEW project but the two that come up most often for me is reusing legacy code that was initially written in C# and writing a C# wrapper when wanting to use a third party driver or library.

Sometimes it’s easier to write the wrapper in C# and then implement the library directly in LabVIEW. When interfacing directly to a third party driver/library, the LabVIEW code to accomplish a relatively simple task can be very messy and cumbersome to read; hence the C# wrapper with simple implementation in LabVIEW is my preferred method. This is how I made my LabSSH and LabSFTP libraries.

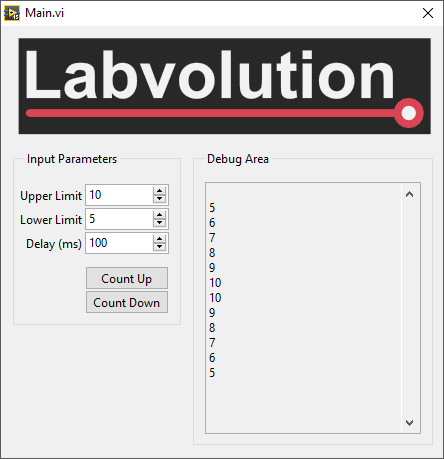
This post is going to cover the process of creating a C# Class Library, creating a C# Form Application to test the library and then finally how to bring it in to LabVIEW. The example that I have used is a very simple counter class. This class will either count up or count down between an upper and a lower limit. The delay between counts can also be set.

When the counter increments or decrements, the current value will be passed to the calling application (Form Application or later LabVIEW Application) using a callback event.

For each section I have created a walk through video instead of a formal tutorial. I find videos easier to follow and you can see the steps to follow a bit easier.

Please note the linked videos are not meant to have sound.

Creating the C# class library

First we need to cover some definitions:

  • Delegate – A delegate is a type that represents references to methods with a particular parameter list and return type. (Read the full definition here)
  • Event – Events enable a class or object to notify other classes or objects when something of interest occurs. (Read the full definition here)

Creating a C# Form Application to test the library

Adding a form application to your solution allows you to test the library in the environment that it was written. I prefer this to testing directly in LabVIEW as each time a new version of the dll is compiled, LabVIEW needs to be restarted.

By testing the dll in C#, you can get immediate feedback to your dll development. If there are problems with the dll when you move to LabVIEW, you know that the functionality is working so the problem is more than likely in the LabVIEW implementation.
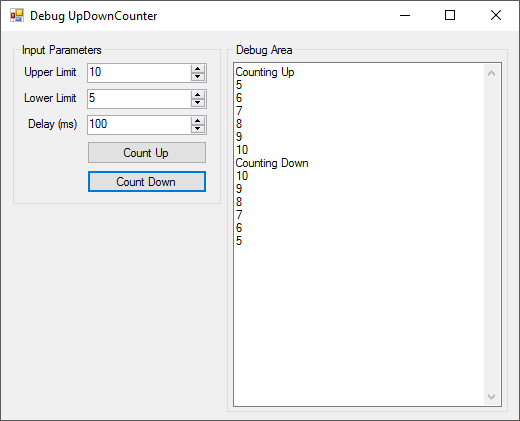
C# LabVIEW Form Application

Implementing the library in LabVIEW

The .NET objects can be found in the Connectivity section of the functions palette.
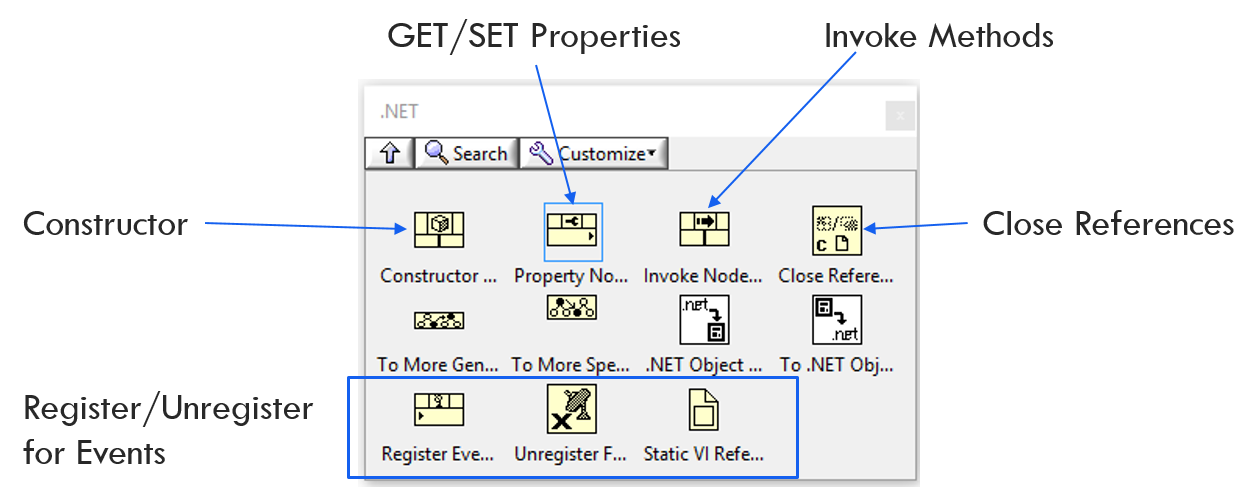
LabVIEW .NET methods

C# LabVIEW Form Application 2

A common bug in LabVIEW is that the callback vi remains reserved for execution even once the references are closed, the event has been unregistered and the application has been stopped.
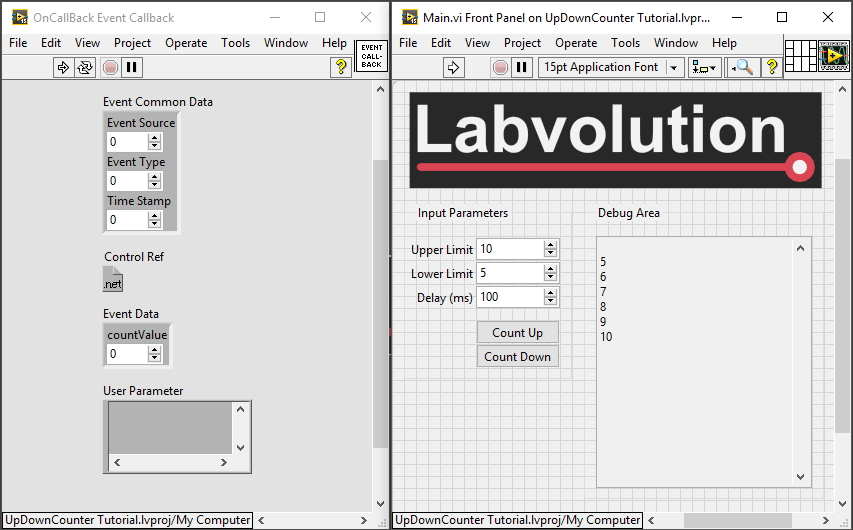
C# LabVIEW Callback Event Remains Reserved

A way to get around this is to include an invoke node once all the references have been closed. Right click on the invoke node and select the following: Select Class >> .NET >> Browse >> mscorlib (4.0.0.0) >> System >> GC >> [S]Collect()

As soon as this method is placed on the block diagram, the callback event vi will no longer be reserved for execution.
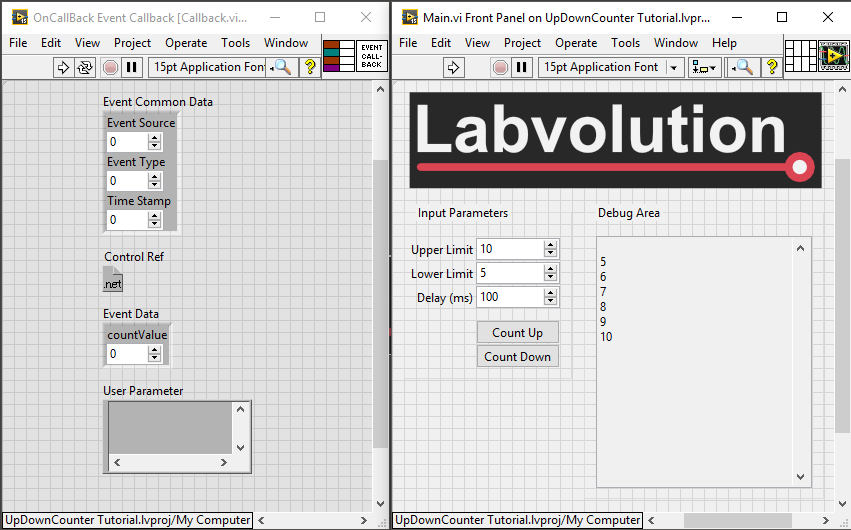
C# LabVIEW Callback Event Cleared Reserve

In summary, this is a very simple implementation of creating a C# Class Library, testing it using a C# Form Application and then using the Class Library in a LabVIEW project.

You can download the C# and LabVIEW source below and as always if you have any questions, please get in touch.

Download LabVIEW and C# Class Library

Greg
SFTP File Transfer for LabVIEW

Please note that this project is no longer being supported and does not support some of the newer connection methods.

Leading on from the LabSSH Library that I shared a while back, I have also created a LabSFTP LabVIEW library.

From Wikipedia, SFTP can be described as follows:

In computing, the SSH File Transfer Protocol (also Secure File Transfer Protocol, or SFTP) is a network protocol that provides file access, file transfer, and file management over any reliable data stream.

As with LabSSH, LabSFTP uses a custom .net class that incorporates some of the features of the RENCI SSH library.

LabSFTP offers the following features:

  • Password authentication to a remote host
  • Private/Public key authentication using the openssh key format
  • The ability to get a list of files or folders from a specified location on a remote host
  • The ability to upload files
  • The ability to download files
  • A public method to check the connection status
  • A public method that will send a stay-awake signal at a specified interval

The video below shows the library being used in an application. The LabVIEW application is communicating with a LinuxLite installation running on a virtual machine.

To get up and running, open the library and start by running the test vi. This will create a connection, get a list of files from a specified location, upload a file and download a file. Make sure that your paths are correct. It has been left to the developer to make sure that files and paths are correct before executing the the specific methods.

As with all my posts, you can download the LabVIEW code below. If you have any feedback, please feel free to contact me on Google+ or send me an email. The LabVIEW application has been tested using LinuxLite and on the latest Raspbian Jessie image running on a Raspberry Pi3.

Download LabVIEW LabSSH & LabSFTP Library

Greg

LabVIEW User Groups

This week I attended my local LabVIEW User Group (CSLUG). I have been a member for a few years and can’t emphasise enough how much you can get out of a two (sometimes three/four) hour discussion once a quarter.

Topics that are discussed can be anything from new and advanced ideas, different ways of documenting code, error handling and anything else that you have an interest in or need help understanding. I am lucky enough to be part of a LabVIEW User Group that has three LabVIEW Champions and a very long list of LabVIEW Architects and Developers who are more than happy to share their knowledge and experience with those willing to learn.

Here are a few reasons to join a LabVIEW User Group in your area, and if there isn’t one, maybe get hold of NI and start one.

  • Meeting new developers in your area with common interests
  • Learning from people who work on bigger/smaller/different types of projects
  • Getting some advice before starting a project
  • Teaching others if you have done something interesting/different, no matter how big or small
  • Seeing how other people solve problems and write code
  • Being part of a community where you can help others and get assistance when needed is invaluable
  • If you don’t have experience presenting in front of an audience, this is a great place to learn 

What I got out of CSLUG this week:

  • A good idea on how to do error handling. Thanks to Steve Watts and James McNally
  • A very cool way to display chart data. Thanks James Powell
  • Creating scalable buttons using vector graphics. Thanks again to Steve
  • A brief introduction to Database Triggers. This is something I never knew about but will definietly be looking in to. Thanks to John White

The biggest idea I got from this weeks LabVIEW User Group was from a chat once most people had gone home. Late on the night before CSLUG I was working on a calibration process and was wondering how to get a value from the previous three states in a while loop. It was late, the code was working but could have been better so I left it for the night.

Then after CSLUG, someone mentioned something about multiple shift registers and something just clicked. I went home and immediately wrote a simple vi to test what I thought he meant and it was exactly what I was looking for.

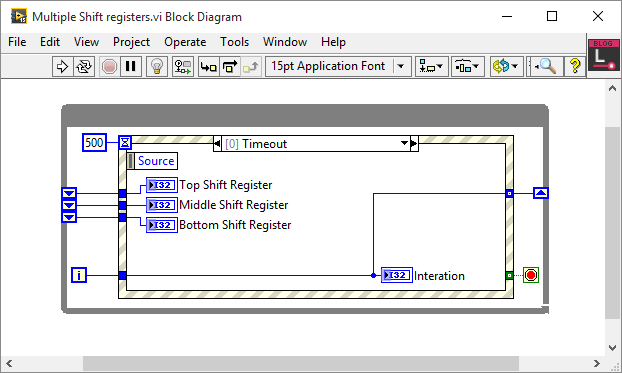
The idea is that adding a shift register to a while loop gives you access to the value of the previous state. This I always knew and use often. What I didn’t know is that you can add multiple input terminals to a single output terminal. This means that the top input terminal is the data from the previous state, the terminal below is the data from the state before the previous state and so forth.

Labvolution - CSLUG

Here is a video of it in action.

Without attending the User Group I might never have come across this. It also wasn’t something on the agenda so you never know what you are going to learn, but you can be assured that you will learn something. Another invaluable tool I use (learnt from a LabVIEW User Group) is the vi property that suspends a vi when called. Have a look this blog post by Chris Roebuck, it will change the way you debug.

My hope for the new year is to try and get to some other LabVIEW User Groups in the area, to meet new people, learn something new and hopefully teach someone else something new.

Have a great Christmas, New Year and happy coding.

Greg

LabVIEW: Discovering New and Old Functions

I have been using LabVIEW Quick Drop for the last few years and find it really useful. I almost never open the functions palette anymore. The one problem I find with Quick Drop (not really a problem with Quick Drop) is that I end up using the same functions over and over again, without discovering new, different or more efficient methods of doing things. By opening the functions palette every now and then, you can quite quickly and easily notice new or unused functions.

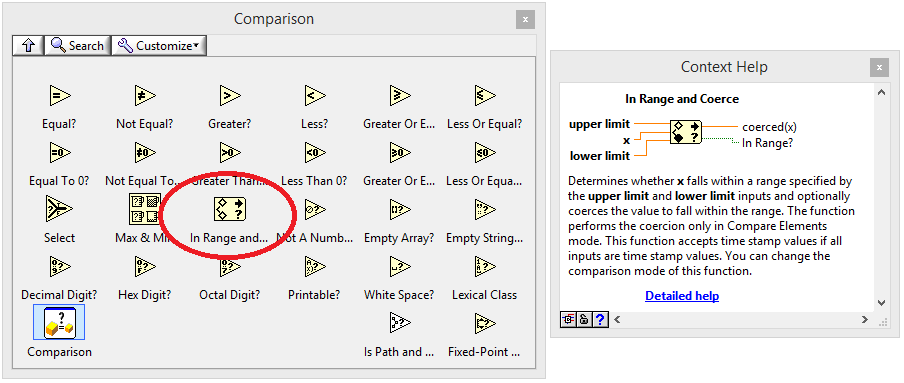
This happened to me a few months ago when I stumbled upon the In Range and Coerce function.

LabVIEW In Range and Coerce Comparison pallette

With writing a lot of test software, I am always comparing measured values to target values. When there is an upper and lower limit, I used to use greater than, AND and less than function. This works but I always thought it looked a bit clumsy.

LabVIEW In Greater AND Less than target

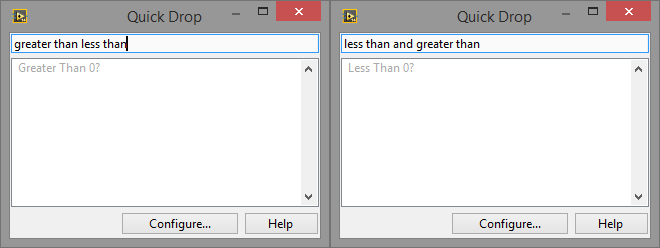
Using Quick Drop, and what I thought to be a good search term to find the function that does this in one step proved unsuccessful.

LabVIEW Quick Drop greater and less

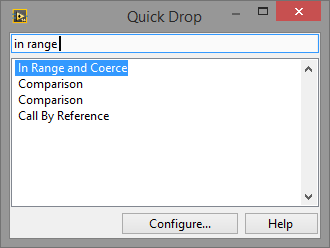
Then one day I decided to go looking through the Comparison functions palette and came across the In Range and Coerce function. This did everything I needed and more and I have used it ever since.

LabVIEW Quick Drop In Range and Coerce block diagram

Knowing what the function does and how it works, it’s obvious why it has the name that it does. This does however make it a bit tricky to look for functions without knowing the name of something and just knowing what you want it to do. Sometimes you find what you need and others you don’t.

LabVIEW Quick Drop In Range and Coerce

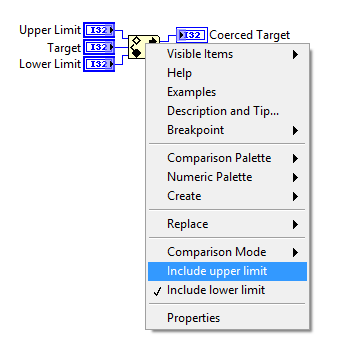
With the In Range and Coerce function, you can also very easily include or exclude the limits from the comparison.

LabVIEW Quick Drop In Range and Coerce block diagram include limits

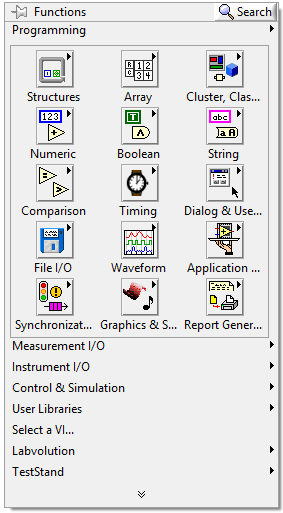
I think Quick Drop is brilliant and significantly increases productivity; however I also think it’s a good idea to every now and then just browse through the functions palette to see the many, sometimes unused functions that are available.

LabVIEW Functions palette

Happy programming and enjoy looking for and using those sometimes unused, new or forgotten functions.

Greg

Installing VMware Tools for openSUSE

This is going to be a really quick post about getting VMware tools running using openSUSE. As mentioned previously, I am using virtual machines quite a bit lately and I had a need to install LabVIEW for Linux. I have used Linux a bit, but ran into all sorts of issues. The aim of this blog post is to help anyone out who has the same problem and also serve as a reminder to me when I need to go through the process again.

Installing openSUSE was straight forward, just follow the defaults. The only change I had to make was disk size and memory allocation in the VMware settings.

Once installed, the first stumbling block was to install VMware tools. This is not as straight forward as you would think. There are a few dependencies that are needed and these must be installed manually. These include GCC, make and the kernel header files. This is not made clear while installing VMware Tools.

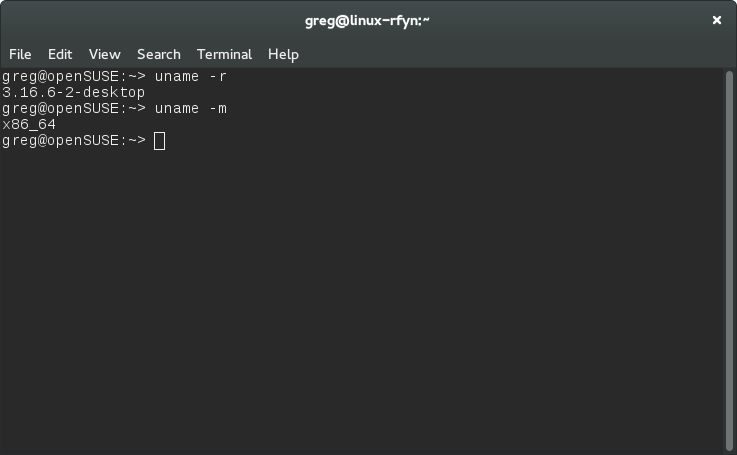
Open a terminal and run uname -r and uname -m. This will print the kernel name and machine name.

Linux LabVIEW VMware - kernel

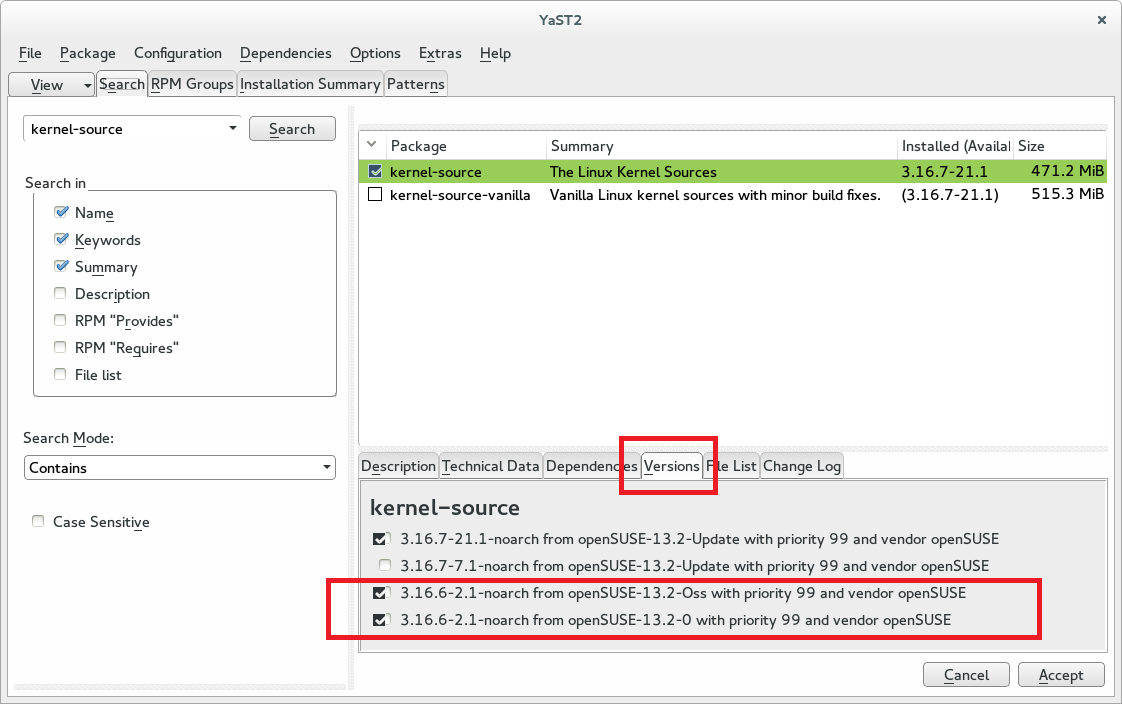
Next, open Settings > YaST > Software Management. Search for ‘kernel-source’ and then under the Versions tab, select the version that was listed in the above step. In my case, I selected 3.16.6-2.

Linux LabVIEW VMware - kernel version

Repeat this step for ‘kernel-desktop’ and ‘kernel-desktop-devel’

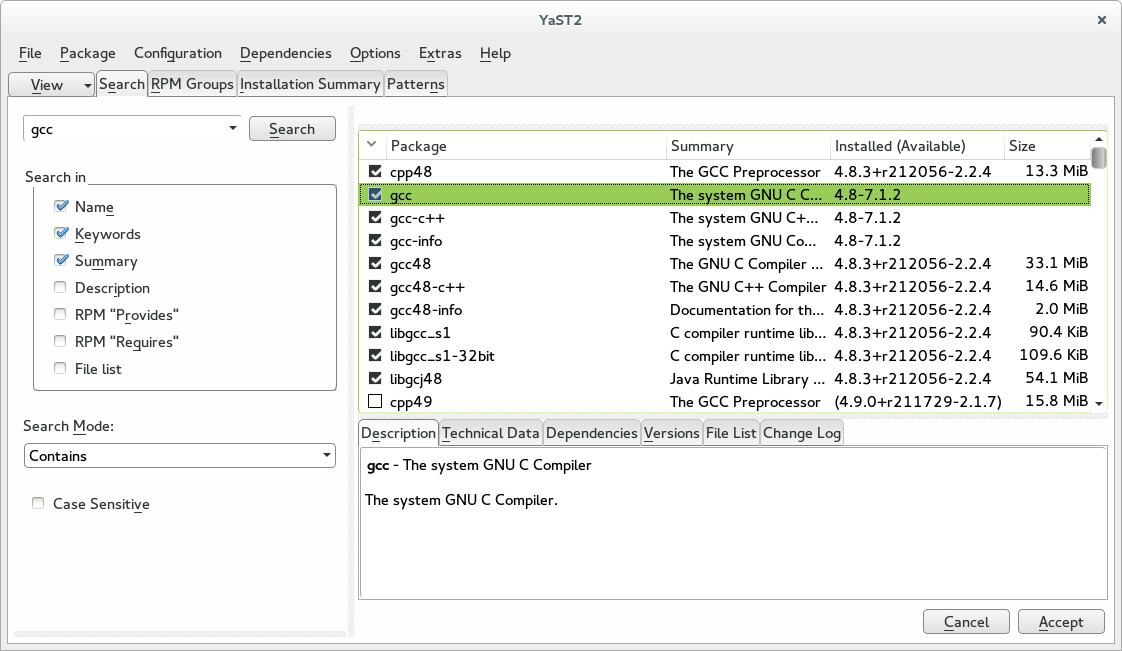
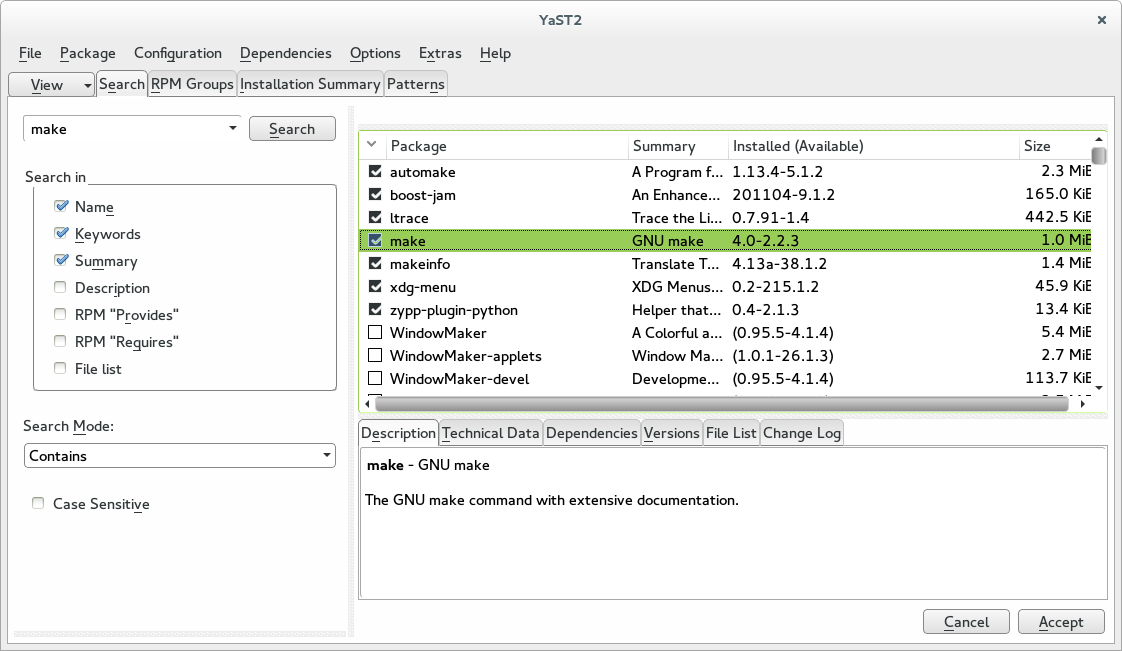
Next install ‘GCC’ and ‘make’ using the YaST as explained above. Once everything is installed, reboot.

Linux LabVIEW VMware - gcc

Linux LabVIEW VMware - make

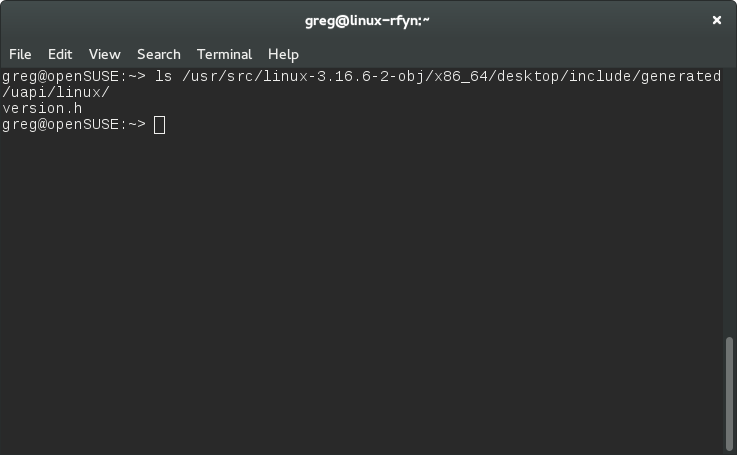
Open a terminal and execute the following command. ls /usr/src/linux-3.16.6-2-obj/x86_64/desktop/include/generated/uapi/linux/

This will show the location of the kernel header that VMware Tools will look for.

Linux LabVIEW VMware - kernel source headers

Make the directory where VMware will look for for the kernel header.  mkdir -p /lib/modules/<uname -r>/build/include/linux and copy version.h from the above step into this directory. You can also create a symbolic link, but I have not tested this.

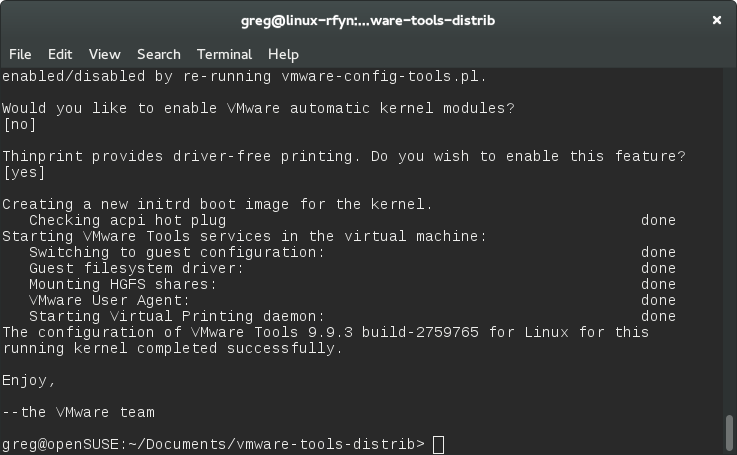
Now extract the tar file from VMware Tools disk that is mounted and run  sudo ./vmware-install.pl. Follow the prompts and it should install OK. Reboot and everything should not work.

Linux LabVIEW VMware - Install complete

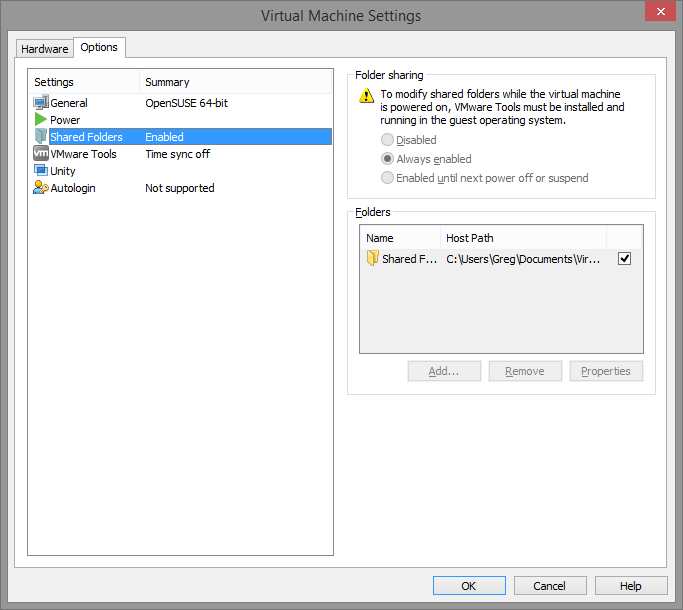
While the virtual machine is power off, enable a shared folder. This will be automatically mounted when the OS boots.

Linux VMware Tools - Shared folder

Boot the virtual machine and open a terminal. If everything is set up correctly, you will notice that the shared folder has already been mounted. ls /mnt/hgfs/Shared\ Folder/openSUSE/ will show your shared folder. You will need to change the names depending on your set up.

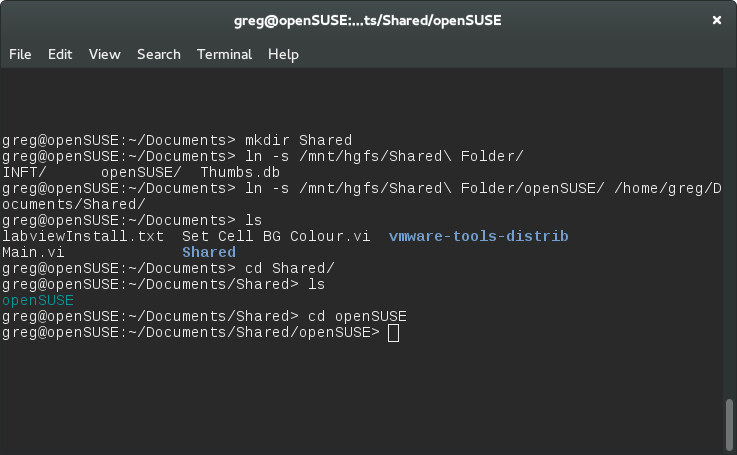
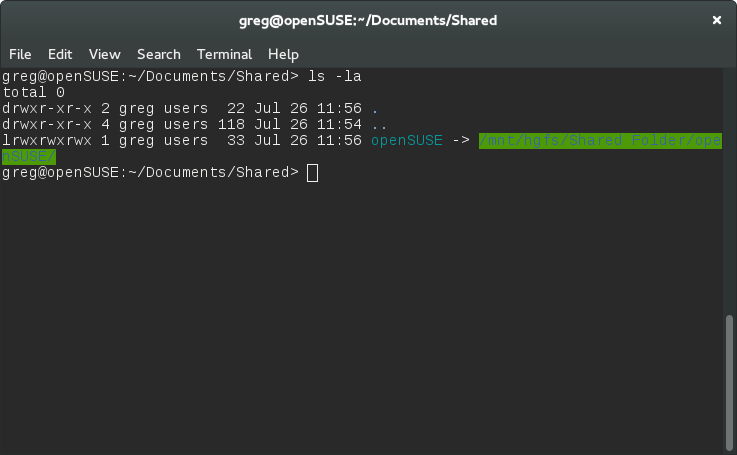
I have created a symbolic link (short cut) in my Documents folder to the mount directory. This is not needed, but I find it cleaner.

Linux VMware Tools - Shared folder sym link -s

Linux VMware Tools - Shared folder sym link

The next step is to get LabVIEW for Linux installed. That shouldn’t be too much of an issue, I hope!

Greg