After making a basic webpage in my previous post, I wanted to expand on it by adding some control. I have used a TI MSP430 LaunchPad as my connected hardware.
In this version, I added two radio buttons to the main page and two normal buttons to submit the selection. I then used an html form with a GET method to pass the selection from the webpage into LabVIEW. Depending on the selection made, LabVIEW controlled the state change of the LaunchPad LED’s through VISA functions.
The following instructions add on from the project in Part 1.
Editing the html page:
Start off by adding the <form></form> code to index.html. This will allow you to send data from the webpage back into LabVIEW at the press of a button. The method being used is GET and the action points to a VI which will handle the data.
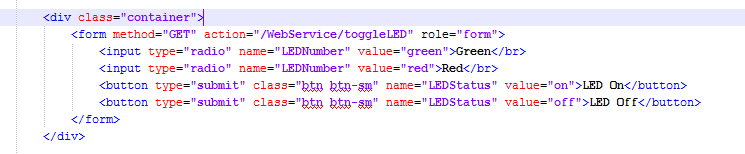
This code will create two radio buttons and two normal buttons. When a button is pressed, the status of the radio button selected and which button pressed will be sent to the VI called ToggleLED in the WebService folder.
Creating the Web Resource:
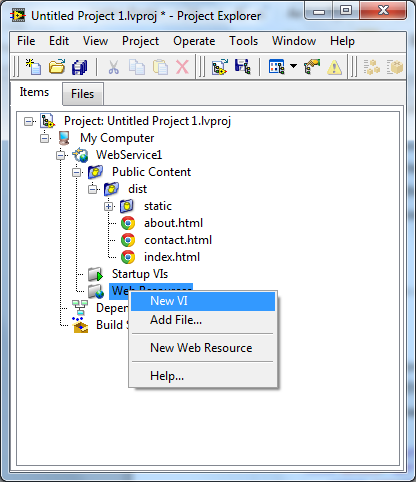
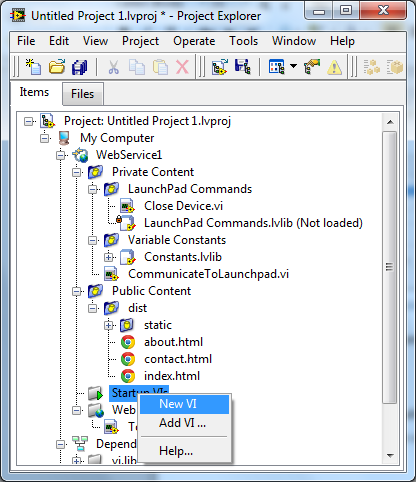
We need to create a VI which will receive the data from the form. Right click on the Web Resources folder in the LabVIEW project and select New VI.
Save this file as ToggleLED.vi in a folder called ‘Web Resources’ in the root directory and close it. We will come back to it later.
Adding Private Content:
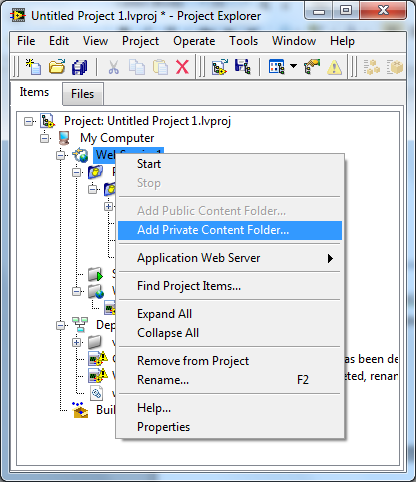
The private content that we need to add are the VI’s that communicate with the external hardware. Make a folder called ‘private content’ in the root directory. Right click on WebService in the project and select Add Private Content Folder. Navigate into the created folder and select Select Folder.
Copy over the VI’s from my download project into this Private Folder. These VI’s include the library to communicate with the LaunchPad, a Variable Constants library and the VI that sends the commands.
Adding a Startup VI:
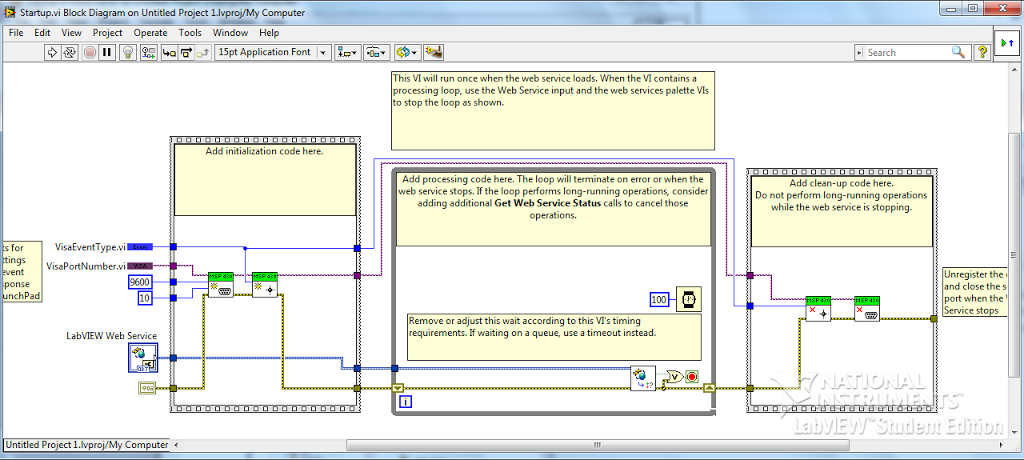
A Startup VI will run when the server is started and continue to run until the server is stopped. We will be using this VI to open and close the connection to the LaunchPad as the server is started and stopped.
Save the VI in a ‘Startup VI’ folder. Either create a new VI or copy mine and add it in the project. The VI should look like this.
Create the GET VI:
Now that we have added all the dependencies, we can go back and complete ToggleLED.vi. This VI needs to read the form data, pass the data to CommunicateToLaunchPad.vi and then redirect back to the main page.
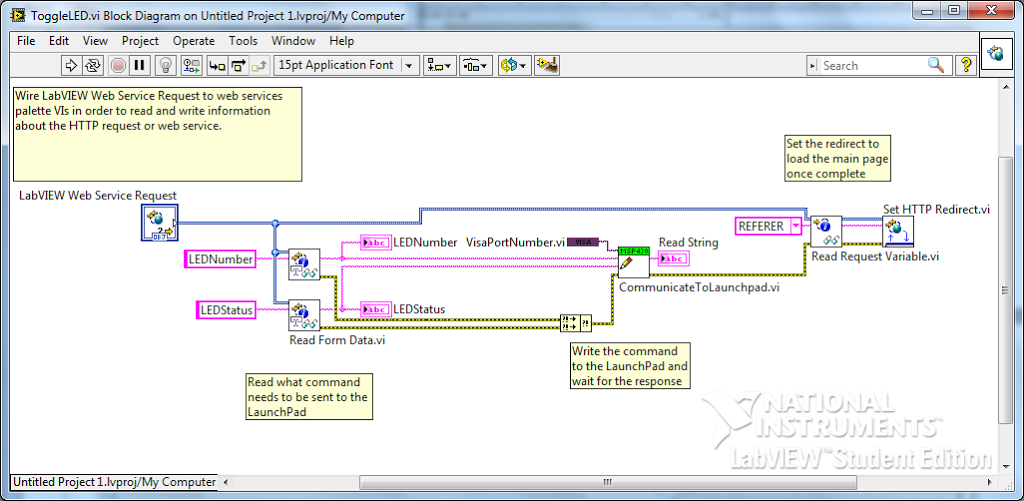
We use the function Read Form Data.vi located in Functions>>Connectivity>>Web Services. The data is then passed into a subVI where the decision is made on what command to send to the LaunchPad. Notice that I have used a Variable Constant for the VISA Resource Name.
Once the hardware communication is complete, I redirect back to the index page. To get the original URL, use the Read Request Variable.vi function with the variable name REFERER. This will return the URL which can be passed into Set HTTP Redirect.vi.
Complete project:
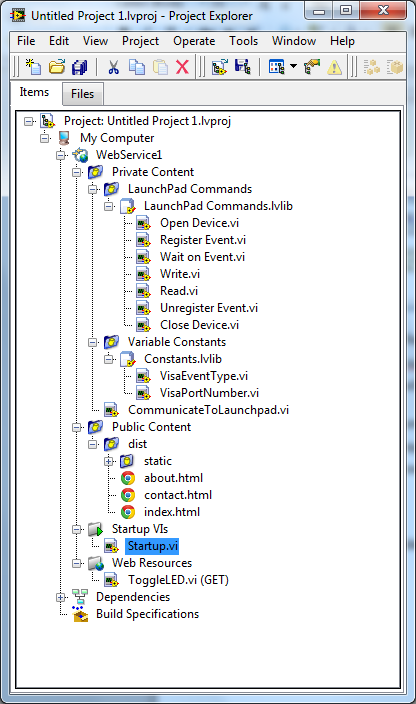
Now that we have added all the files, we should have a complete project that looks like this.
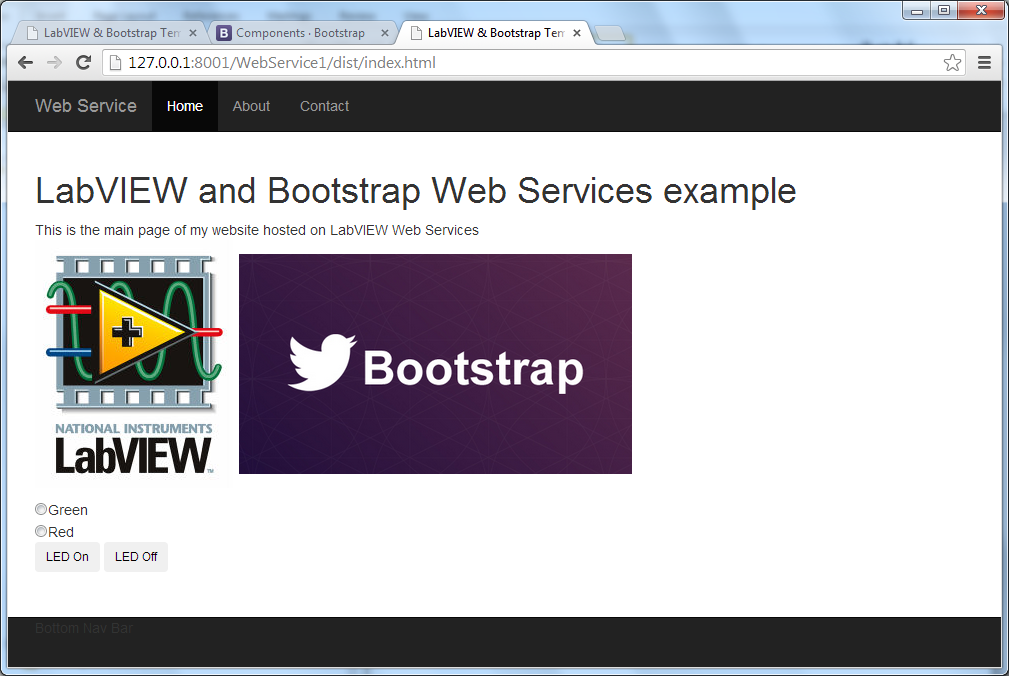
We should now be ready to test our website. Save the entire project and Start the server. Navigate to the URL and you should see the following page.
Once the server is running and the page is open in the browser, open ToggleLED.vi front panel from the LabVIEW project. Select one of the radio buttons and then press a button. You will now be able to see what commands were received by LabVIEW by inspecting the indicators in ToggleLED.vi.
I have disabled the VISA functions in the uploaded project. If you want to try them, all you need to do is remove the Diagram Disable Structures from Startup.vi and ToggleLED.vi. This will then communicate with the LaunchPad; however if there is no hardware connected, the redirect will not work and an XML page will be returned after a button is pressed. You will also need to change the VISA Resource in Constants.lvlib:VisaPortNumber.vi.
That’s all for Part 2. If you have any questions, comments or advice for me, please leave a comment below. Part 3 should be up once I have decided on what to add and figured out how to do it.
Download LabVIEW Web Services part 2Greg


