I have been playing with LabVIEW Vision Development Module a bit over the last few months. I have an idea for a project that tracks the movement and vibrations of an object. Using a standard 24 bit RGB colour works, however if the same x;y coordinate is passed over more than once, visually it is difficult to see what is happening.
While making drawings in Inkscape, I am able to change the opacity/alpha level of a colour. This adds an extra 8 bits onto the colour, making it a 32 bit RGBA colour. According to Wikipedia:
The alpha channel is normally used as an opacity channel. If a pixel has a value of 0% in its alpha channel, it is fully transparent (and, thus, invisible), whereas a value of 100% in the alpha channel gives a fully opaque pixel (traditional digital images). Values between 0% and 100% make it possible for pixels to show through a background like a glass (translucency), an effect not possible with simple binary (transparent or opaque) transparency. It allows easy image compositing.

The above image, made in Inkscape, indicates how many dots with an alpha level of 0x2D, gets a more intense colour the more layers are added on top of each other. My project idea will then use this concept to show a type of intensity map.
I ran into my first problem when using the standard LabVIEW 2D Picture. From what I have seen, this is the only indicator in the standard LabVIEW package where you can display and draw pictures. This works well, and I have used it before, but only 24 bit RGB colours can be drawn. Even if you import a png image with alpha colours, they will be lost when displaying the image in a 2D Picture.
This led me to look at other ways that images can be displayed and drawn in LabVIEW. I decided to try using a .NET container with a System.Windows.Forms PictureBox.
I have used Windows dll’s before and they have generally worked quite well, obviously only on Windows machines. The main problem that I find is getting the versions correct and also finding the methods and properties that you want to use, as the libraries are usually very large. To get around this I turned to some C# and VB examples to see where to get started.
My aim was to get the concept working so that I can use it in a bigger project. I used my mouse cursor position to to draw many filled circles that follow the mouse. These were the steps that I followed:
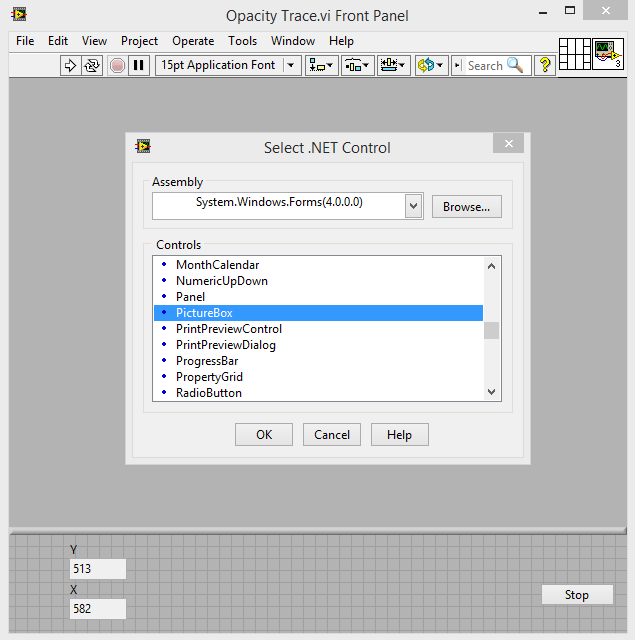
Add the .NET Container to the front panel and insert a PictureBox control:
I made the container fill the pane so that it was easier to get the mouse position relative to the panel. The PictureBox can be found in the System.Windows.Forms class.
Create a new bitmap the same size as the PictureBox:
It is good practice to create a bitmap inside the PictureBox and then do all your drawing onto the bitmap. This makes saving and clearing the image a lot easier. Once the bitmap is created, add it to the PictureBox as an image. The bitmap can be found in the System.Drawing class.
Create the SolidBrush that we will use to draw the filled circles:
This is where we can define the colour (RGB) as well as the alpha level. Color and SolidBrush are both from the System.Drawing class.
One top tip to remember, when looking for the colour property and method, remember to spell it color and not colour. Windows is American so the spelling can catch you out.
Once you have defined the brush, you can start to draw onto the bitmap using the System.Drawing.Graphics class. In this case, I chose to draw a FillElipse (filled circle), but you can choose one or more of many different drawing tools.
I ran this in a while loop so that I could draw many circles and then when I stopped the application, I called the Bitmap.Save method and saved the bitmap as a png image. By saving it as a png image, you will keep all the alpha colours. The slower you move the mouse, the close the circles are together which implies that the circles are darker, more layered on top of each other.

You can see that I also added a date and path to the image. This is what the image will look like in the .NET PictureBox. If you import the same image into LabVIEW using the Read PNG File function, you get this:
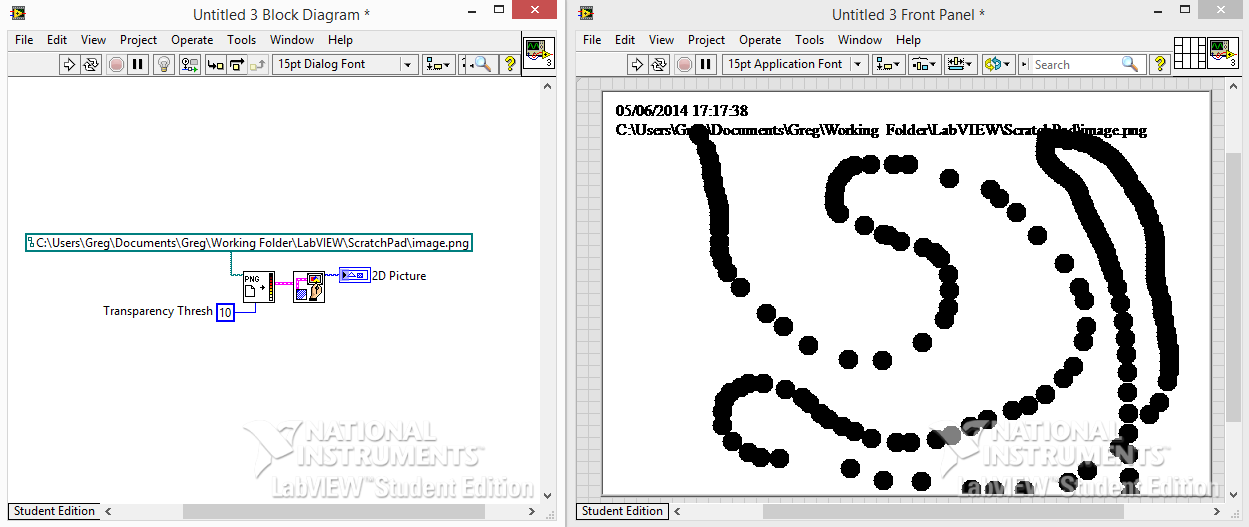
As you can see, all the alpha colours have been lost. You can set the alpha level threshold so that anything above that level is set to its equivalent solid colour.
So although it is a bit more work to get the PictureBox working and set up, it is much better to display 32 bit images.
If you want to have a look at the code, please feel free do download it from below. As I mentioned earlier, versions might play a role in the vi working properly so I have developed this using LabVIEW 2013 on a Windows 8 machine.
If you need any assistance or have any tips, please leave a comment and I will get back to you.
Download Alpha Colours LabVIEW code
Greg