I have had a National Instruments myRIO for a few months but have not had a chance to use it yet. I bought it so that I can get some experience working in LabVIEW Real Time and with the LabVIEW FPGA.
I started off using the default FPGA build and express vi’s but quickly ran into a problem when I tried to use the SPI express vi. Each time I tried to configure the express vi, LabVIEW crashed. After a while this got extremely irritating so I started looking at the myRIO Custom FPGA Project.
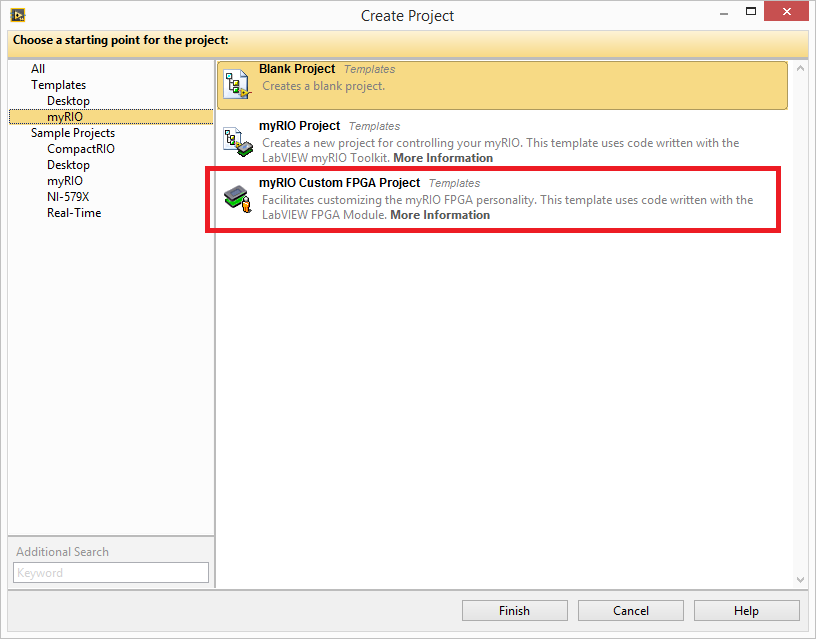
To use digital IO this project worked really well. Again the problem came when I wanted to interface to an SPI device. I have used SPI a lot in previous projects so understand the concept and how it works. Despite being a project template, with a documentation folder, nowhere does it explain how to use and implement the custom FPGA build. If there is further documentation, please let me know so I can go through it to get a better understanding of the project.
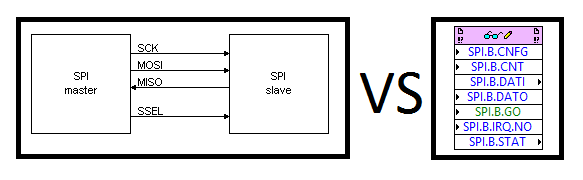
One more small rant before I get on to a solution you can use, is the SPI naming used in the myRIO Custom FPGA Project does not conform to the norm. Again, if I have read and understood it incorrectly, please let me know.
While looking for some documentation on the myRIO project, I came across this example which explains a bit about how to write an SPI driver and also has an example. This example is written for the sbRIO but can be very easily modified to run on the myRIO and also has a nice, simple API. The last section of the NI article outlines in a few lines how to recompile for a different FPGA target. Here is a more detailed description with a few extras that I have added. Firstly, download the example project here.
These are the steps that I followed to to get it working on a myRIO. I’m sure the steps will be very similar when moving to any other FPGA target.
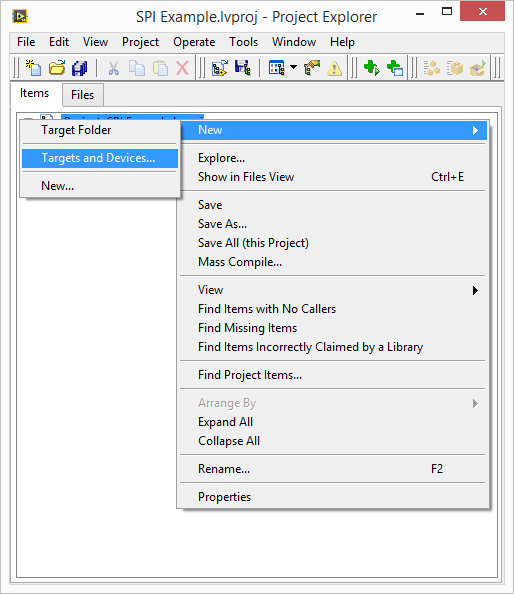
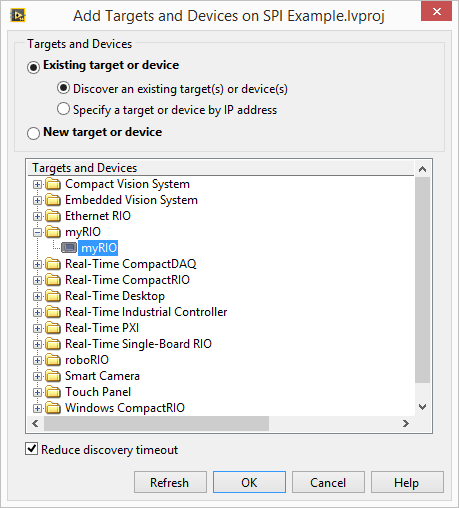
Add your target to the project.
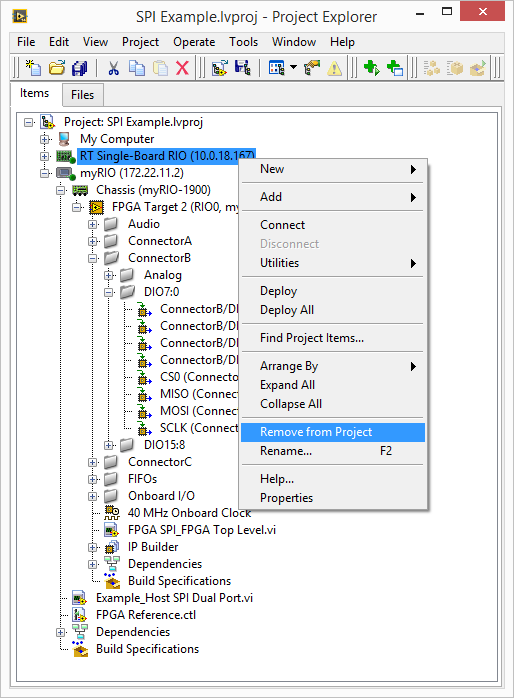
Once you have the myRIO target added to the project, copy the FIFO‘s and Example_Host SPI Dual Port.vi from the sbRIO FPGA Target to the myRIO FPGA Target. Make sure to copy them to the FPGA Target and not the RT Target. Then copy Example_Host SPI Dual Port.vi and FPGA Reference.ctl from the sbRIO RT Target to the myRIO RT Target.
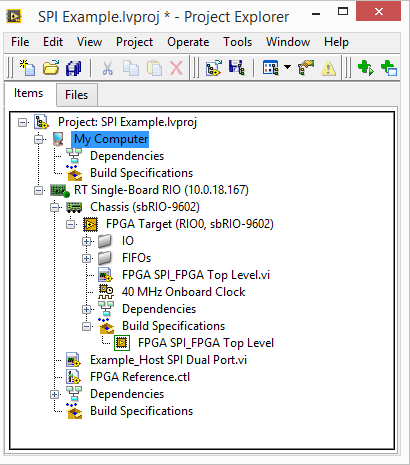
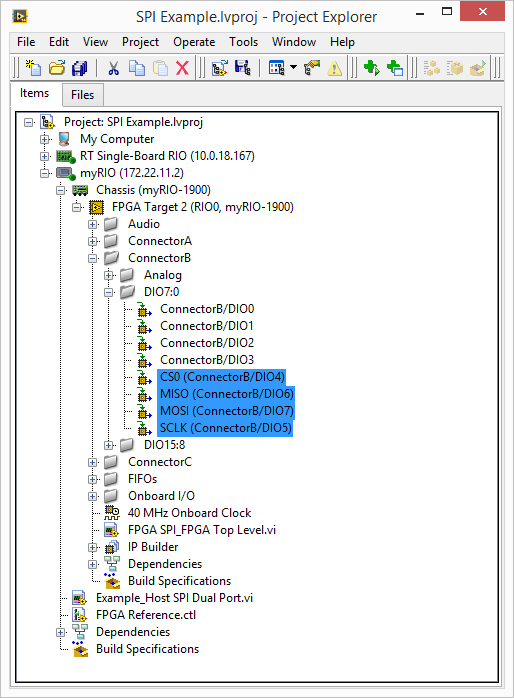
For my project I decided to use Connector B. Rename the IO that you are going to use for the SPI communications. Your project should now look like this.
Next we have to edit the FPGA code to work with the new references set on the myRIO FPGA. Open Example_Host SPI Dual Port.vi. I have deleted one of the SPI ports as I only need one.
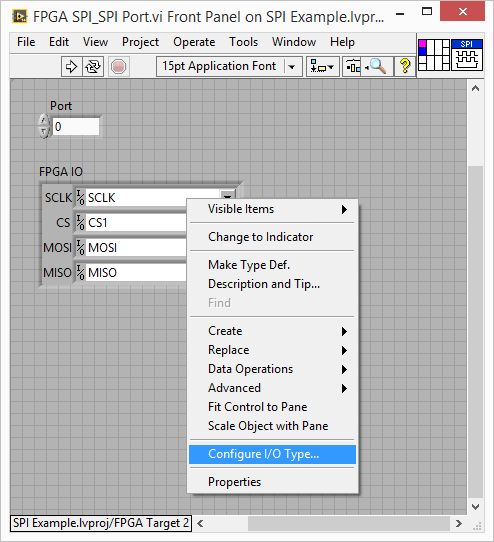
Open FPGA SPI_SPI Port.vi and change the references in the FPGA IO cluster to point to the IO we configured in the previous step. Right click on each reference and select Conifigure IO Type…
Select the corresponding reference and then Replace All.
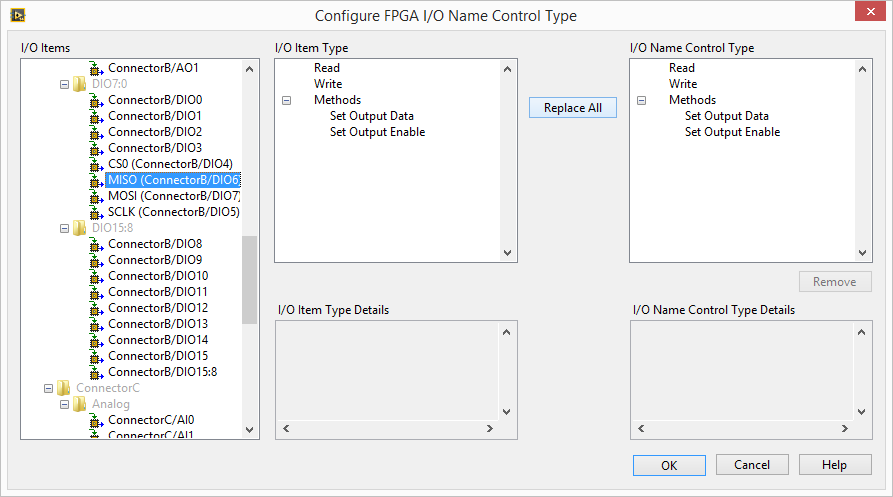
Do this for each reference. You will notice that when you change the CS reference, the vi breaks. We will fix this next. The reason the vi breaks is that the CS line on the original sbRIO FPGA code was set to a line and not a port. When changing form a line to a port, the element is now boolean and not U8.
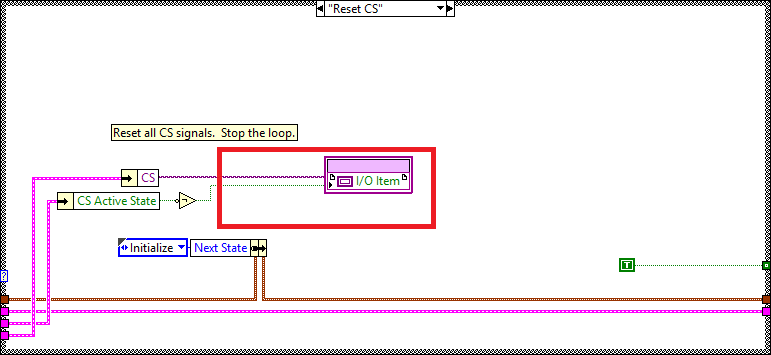
The two changes that need to be made to FPGA SPI_SPI Port.vi are removing the Index Array in the Reset CS case and add a Number to Boolean Array and Index Array to the Set CS case. This will test the state of the LSB which will be the CS state.

Save and close the vi. In Example_Host SPI Dual Port.vi delete the FPGA IO cluster and then add it again by adding a constant to the subvi. This will update the references that have been changed. Save and close all open vi’s. Remove the original sbRIO Target and save the project.
You are now ready to compile your myRIO SPI project. Right click on FPGA SPI_FPGA Top Level.vi and select Create Build Specification. When compiling there are a few choices for where you want to compilation to take place. To compile this locally it took me around 50 min, compared to compiling on the NI Cloud Portal which took less than 10 min.

To access the NI Cloud Portal, you need to register an account as your normal community account does not work here. Once registered you will need to verify your account through an email confirmation. You also need to enter a Product Activation Code. This is not the code that you use as your LabVIEW license. I had to call NI and get them to generate a 20 character code that I entered. You will need an active SSP to get a code generated. The time it takes to call NI and get the code is less than one compilation so is totally worth it.
Once the FPGA compilation is complete, open Example_Host SPI Dual Port.vi. You will notice that the run arrow is broken. To fix this we need to link Open FPGA VI Reference to the correct bitfile. Right click on Open FPGA VI Reference and select Configure Open FPGA VI Reference…
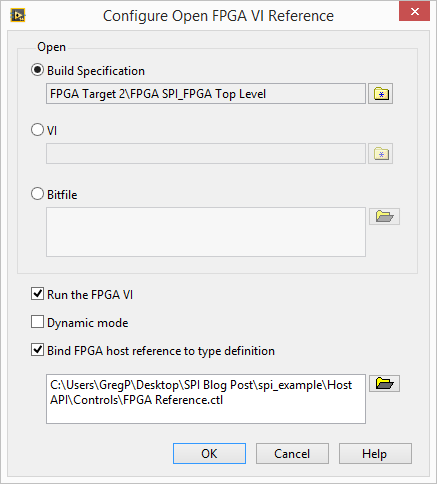
Select the Build Specification and then select Overwrite in the dialog that pops up. The vi should now be executable.
Run the vi, select your slave device SPI settings and mode and then press the Write button. You will notice data will be read back.I have a LM74 temperature sensor connected which uses 16 bits SPI mode 0.
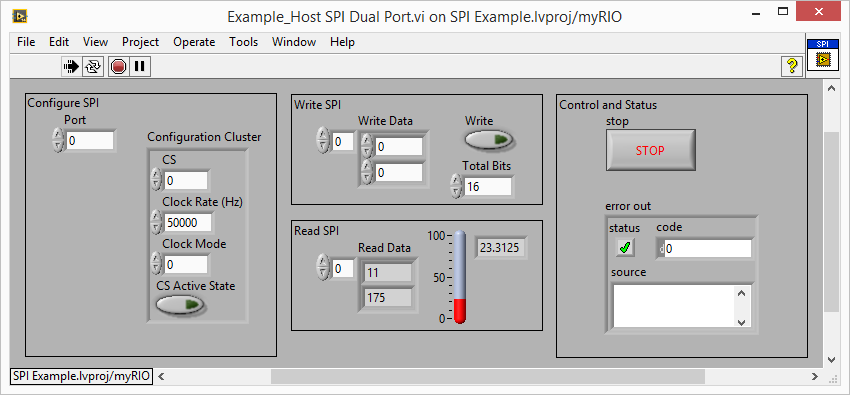
There you have it. SPI running on a myRIO FPGA with an API which can be used on an RT host.
As usual, if you have an questions or advice, please feel free to get in touch.
Download myRIO SPI Example Code
Greg